How to backup a Mac with Time Machine
Backup
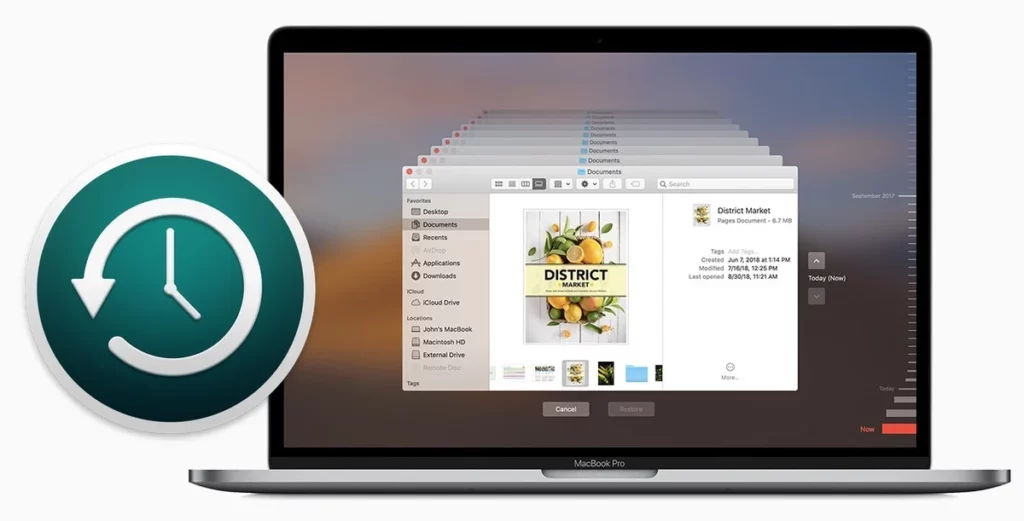
Figure of Time Machine
Take no chances with the data on your Mac! Apple’s Time Machine makes backups simple. This is how.
Suppose the worst. you are losing precious photos due to a failing Mac hard drive deleting your dissertation by mistake. Even though you may believe it won’t happen to you, all it takes is a glass of water to spill on your MacBook for you to lose everything.
In a different essay, we go into great detail about the necessity of backing up your Mac, but in this one, we will concentrate on Time Machine specifically.
Everything you need to know about using Time Machine to back up your Mac is covered in this tutorial, including how to use it, what to do if it’s running slowly, and what to do if your backup fails because there’s not enough space, and how to delete. We’ll also go over using Time Machine to back up numerous Macs.
What does Time Machine accomplish?
Every Mac is pre-installed with Time Machine and All you require for backup is a separate storage device or a macOS Server.
Everything on your Mac is kept in a copy by Time Machine. This does not imply that all of the previous changes are replaced with new ones. Each project you are working on is stored in Time Machine in different versions. For instance, you can view both the Wednesday and Thursday versions of a document that you were working on.
In essence, if you were working on a document constantly, you would have 24 copies from the previous 24 hours, one copy for each day of the previous month, and one copy per week from the months before.
Additionally, it is quite simple to find older versions of a file, which is helpful if you decide not to save changes that were made a few days ago. Everything is arranged exactly the same way it was in the past when you go through your Time Machine.
So, for instance, if you accidentally erased a file from your Desktop last Thursday, you can go back to the Desktop folder to recover the file. Apple named it Time Machine because, in a sense, finding the file requires going back in time, which is why. However, when you reach that stage, the older backups will be removed to create room for fresh ones.
Your settings, files, and folders will all be just as you left them. Below, we’ll go over how to replicate your Time Machine to a new Mac and how to recover your Mac.
requisites for a time machine
A reasonably sizable external storage device is required. This might be a hard drive or SSD that you put into your Mac through USB, Firewire, or Thunderbolt, or it could be a NAS disk that your Mac connects to via WiFi. If you have the money, we suggest purchasing a device with at least 1TB of storage.
OS X Leopard or a later version, though we advise updating to the newest Mac OS.
To help you select the finest option, we’ve compiled a list of the best NAS devices, hard drives, and SSDs.
Using a Mac, how to install Time Machine
- A Mac should be connected to external storage.
- If it isn’t already formatted as Mac OS Extended (Journaled), open Disk Utility and follow these instructions.
- Apple has made it possible to choose between HFS+ or APFS for the Time Machine backup in Big Sur; however, the Mac that you try to restore an APFS backup onto must be running Big Sur. Read: With the release of macOS Big Sur, Time Machine will finally support APFS.
- If the disk is properly formatted, your Mac should display a message asking if you wish to utilize the drive with Time Machine. Simply select Use as Backup Disk.
- Open the Time Machine preferences by going to System Preferences > Time Machine if you don’t see the alert.
- Click Use Disk, then choose Backup Disk and the storage device you want to backup to.
- Your backups can be encrypted if you choose. If you do that, a password is required to access your backups.
How to access Time Machine more quickly
It will be simpler for you if you create a shortcut to the Time Machine menu if you don’t already have one. This icon was there in El Capitan but vanished following Sierra’s 2016 launch.
You can make a shortcut to the Time Machine options in the shape of a Time Machine icon in the menu on the right-hand side of your screen’s top if you can’t see this icon, which resembles a clock with a curving arrow.
Open System Preferences > Time Machine and select Show Time Machine in Menu Bar if you can’t see this symbol. Drag the Time Machine icon into your Dock after choosing the Time Machine symbol in your Applications folder.
When should a Mac be backed up?
The beauty of Time Machine is that it will back up almost constantly, but instead of making a full backup of your Mac each time, the program merely copies the items you are working on, barely noticeable.
The advantage of Apple’s approach is that, rather than repeatedly redoing until you reach that version, you can pull up a copy of a document you were working on an hour ago.
It’s crucial to keep in mind that, even while Time Machine does routine backups and it can only do so if your Mac is linked to the device. Don’t forget to plug in an external storage device, if it is one, as it may be necessary for your Mac. Speaking of which, before your Mac will perform a Time Machine backup, it must be plugged in.
You will notice notifications urging you to back up if you haven’t used Time Machine on your Mac in a while. Do not let your laptop get wet until 100 days have passed since your last Time Machine backup (we say this from experience)
How to force a backup with Time Machine
Time Machine automatically creates backups every hour. For example, if you are going to shut down your Mac and want to be sure the Time Machine backup is current first.
Simply select Back Up Now by clicking on the Time Machine icon in the menu bar or by going to System Preferences > Time Machine.
How much time does a Time Machine backup require?
This can differ greatly. If there have only been a few changes since the last backup, it should just take a few minutes to complete this one. However, it will definitely take some time if this is your first backup or if you haven’t made a backup in a while.
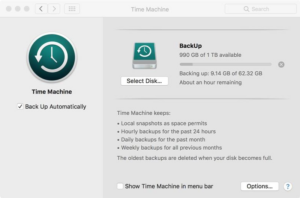
Go to System Preferences > Time Machine or click on the Time Machine icon in the menu bar to learn how long will take. A progress bar that displays the amount of data being backed up in gigabytes and the remaining time will be visible.
You will first only see Preparing Backup; after that, after the software has calculated how big the update will be, you will see it.
You can stop Time Machine from backing up your Mac if you don’t have time right away—perhaps you need to shut down your computer and run home.
You will notice an X next to the progress meter mentioned above. Select Skip This Backup from the Time Machine menu to stop a backup and resume it later.
How to stop Time Machine from automatically backing up
- Navigate to System Preferences > Time Machine to stop automatic backups.
- Uncheck the box for Automatic Backup. Turn off Time Machine in Mac OS X El Capitan or earlier.
- The next time you wish to backup your Mac, click on the Time Machine icon that is currently grayed out in your menu bar and then select Back Up Now.
The backup cannot be finished using Time Machine.
Occasionally, Time Machine won’t back up your Mac, in which case an exclamation point will appear in the center of the Time Machine symbol in the menu bar.
The external drive might not have enough capacity, it might have become corrupted because you unplugged it without first removing it (this is why it’s crucial to always properly eject a drive before disconnecting it), or it might not be formatted properly.
The external drive might not have enough capacity, it might have become corrupted because you unplugged it without first removing it (this is why it’s crucial to always properly eject a drive before disconnecting it), or it might not be formatted properly.
Use Disk Utility to reformat the disk if you discover that it is not properly formatted. The drive must be Mac OS Extended (Journaled) with a GUID Partition Table (GPT) in order to function with Time Machine. You will lose everything on the disk if you have to reformat it, so create a copy first or use another drive if you can.
Lack of space caused the Time Machine to fail
You could decide to leave certain things out of your backup. Take these actions:
- Select Time Machine preferences by clicking the Time Machine symbol in your menu (or open Time Machine from System Preferences).
- Select Options.
- Locate any files or directories you want to omit from the backup by clicking + and then selecting them. For instance, if you have iTunes Match, you may decide not to backup your music collection as Apple’s iCloud will already have a copy of it.
- As an alternative, you might remove outdated backups from your storage device, though Time Machine ought to do this on its own over time. The backup files can be found in the Backups. backup folder when you open the storage disk in your Finder. You’ll need to delete some of the older files and take them out of the trash.
Tips for accelerating Time Machine backup
Expect it to take some time the first time you use Time Machine to backup. The majority of the data on your Mac is copied by Time Machine. At least you can continue using your Mac while Time Machine backs up your data in the background.
Moving your Mac into the same room as your router or connecting the storage device to your Mac or the Mac to your router with an Ethernet cable may make network backups to servers or network-attached storage devices (NAS) faster. This ought to make your network faster.
Time Machine may take longer to finish a backup if you just upgraded your macOS operating system.
If your previous backup was interrupted, a lot of files have changed, or perhaps the backup device hasn’t been plugged in for some time, backing up your Mac with Time Machine may take some time.
While you’re sleeping, backup your Mac
If your Mac has Power Nap support, you can run Time Machine backups when it’s dozing off or the lid is closed. It only has to be hooked into a power source.
Under System Preferences > Energy Saver, you may discover Power Nap.
If it isn’t already selected under Power Adapter, select Enable Power Nap while Plugged In.
How to backup numerous Mac computers
You just need one external drive for your backups if you have multiple Macs. It is advised that you tally up the total amount of space needed by all of your Macs and multiply that number by 1.2 to determine the bare minimum size of the external disk you will require.
Simply connect another Mac to your Time Machine drive. The Mac will begin creating its own backups and save them to a unique folder on the drive.
If you don’t feel like constantly plugging and unplugging the drive, be aware that this could take longer than doing so over a wired connection. You might configure a network-connected storage device, or a macOS server, or utilize Personal File Sharing to establish a network connection between the two Macs.
FAQ
How much time should a Mac backup require?
If your Mac is brand new and has very little data on it, doing a backup shouldn’t take more than 5 or 10 minutes. For us, the wait time for Time Machine to finish its initial backup of a 10 GB backup was only about 10 minutes.
Should I back up my Mac using Time Machine?
Your main backup system should be Time Machine on your Mac. After a crash, it not only enables you to get your Mac back up and running, but it also enables you to recover specific files or folders that you might have mistakenly deleted.
What exactly does Apple Time Machine back up?
Your whole Mac, including system data, programs, accounts, preferences, email messages, music, photos, movies, and documents, is automatically backed up by Time Machine.
Editor recommended
Methods for Using Microsoft Edge’s Cache
How to cure a Mac’s blue screen